How to use ToolRocket Video Converter
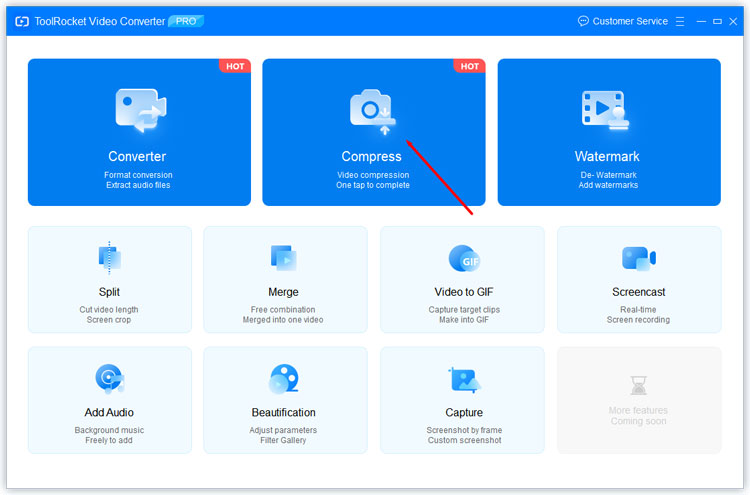
ToolRocket Video Converter is a powerful video converter and editor on Windows computer. It helps you convert almost all video and audio formats in high quality. In addition, you can cut/merge videos, optimize videos, add/remove watermark to/from a video, record screen, etc.
ⅠConvert Video
Run the software on your computer. Select “Converter” to use the video converter function.
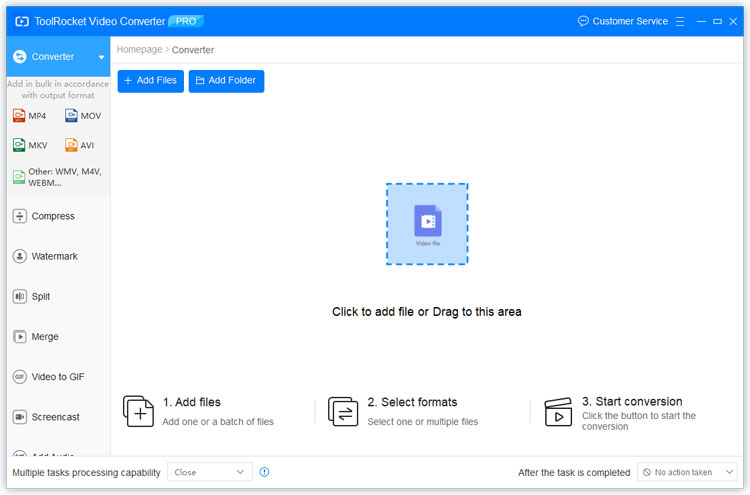
1Add Files
Click “Add Files” or “Add Folder” button to import your video/audio files into the program. Besides, you can click the “Add” symbol in the middle of the interface or drag the file(s) directly to the interface. Then, they will be displayed in a file list.
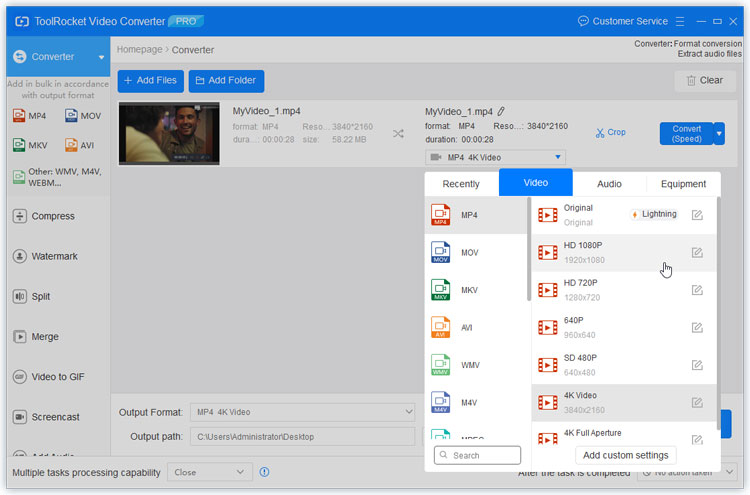
2Select an output format
Click the drop-down list of output format, select a format of video, audio, and device to set the output format.
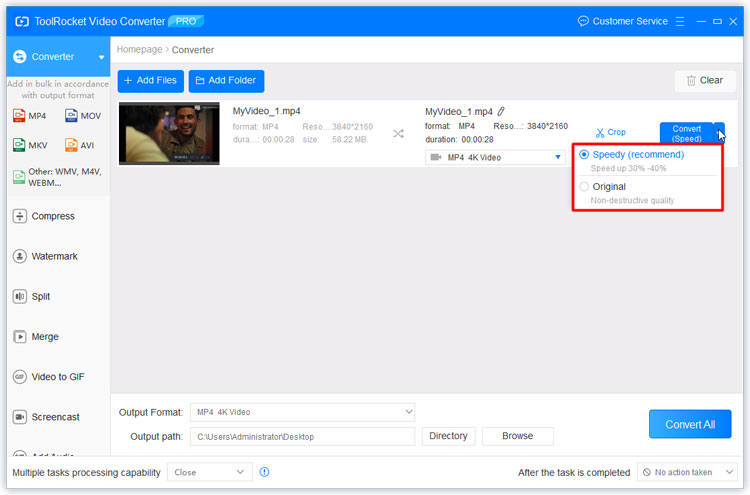
3Set the conversion mode
At the right side, click the drop-down list of the “Convert (Speed)” button. A speedy and together with an original mode are available for you. For a high-speed video conversion, you can choose “Speedy”. Otherwise, you can set “Original” for a non-compressed video conversion.
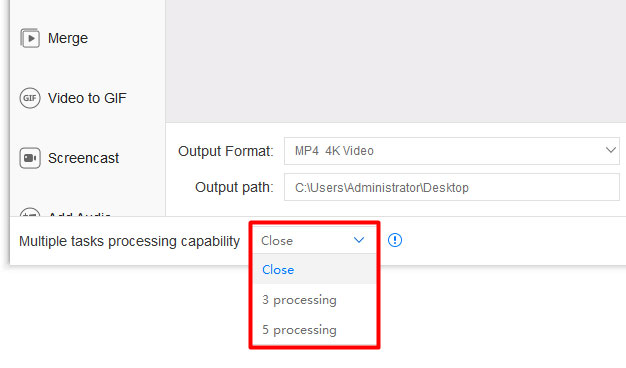
4Multiple tasks
At the bottom of the software, there is a drop-down button for you to set the multiple tasks processing capability. You can choose “Close”, “3 processing”, and “5 processing”. If you choose “Close”. The videos added will be converted one after another. If you choose 3 or 5, it means that 3 or 5 files will be converted together.
5Action after conversion
At the right bottom corner of the software, you are able to define what the software will do after converting, such as “No action”, “Close the software”, “Shut down the computer”, or “Sleep”.

6Convert All
After set the output path, you can click the “Convert All” button to start to convert all added video/audio files.
ⅡCompress video
Go back to the main interface of ToolRocket Video Converter, and select “Compress”.
1Add Files
Click “Add Files” or “Add Folder” button to import your video/audio files into the program. Besides, you can click the “Add” symbol in the middle of the interface or drag the file(s) directly to the interface. Then, they will be displayed in a file list.
2Compression settings
Click the “Settings” button in the file list. It enables you to set the compression parameters. With the basic functions, you can set the compression rate or enter an estimated file size. If you choose the advanced settings, you can change the video resolution, bit-rate, video encoders, FPS, audio encoders, audio bit-rate, sample rate to make the file smaller. Confirm “OK” to apply the settings.
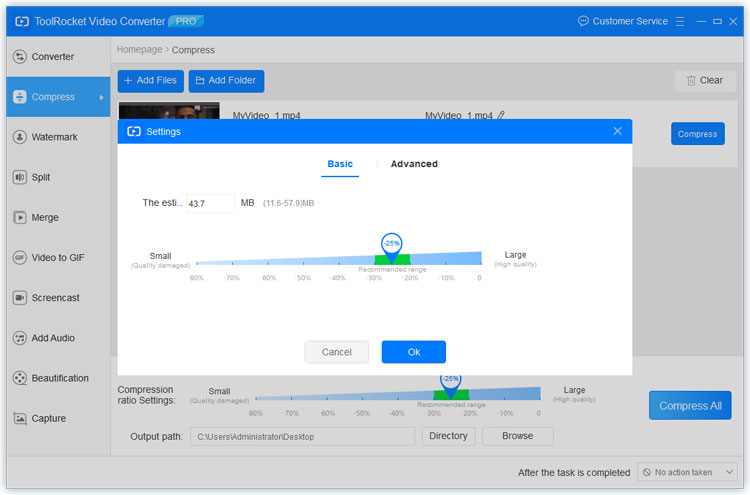
3Compress All
After settings, click the button at the right bottom corner. Then the file will be compressed and saved in the output directory.
ⅢAdd watermark
1Add Files
Click “Add Files” or “Add Folder” button to import your video/audio files into the program. Besides, you can click the “Add” symbol in the middle of the interface or drag the file(s) directly to the interface. Then, they will be displayed in a file list.
2Add watermark to a video
Click the “Add watermark” function in the file list. In the pop-up window, click “Browse” and select an image as logo on your computer. At the same time, adjust the transparency and time to display the watermark.
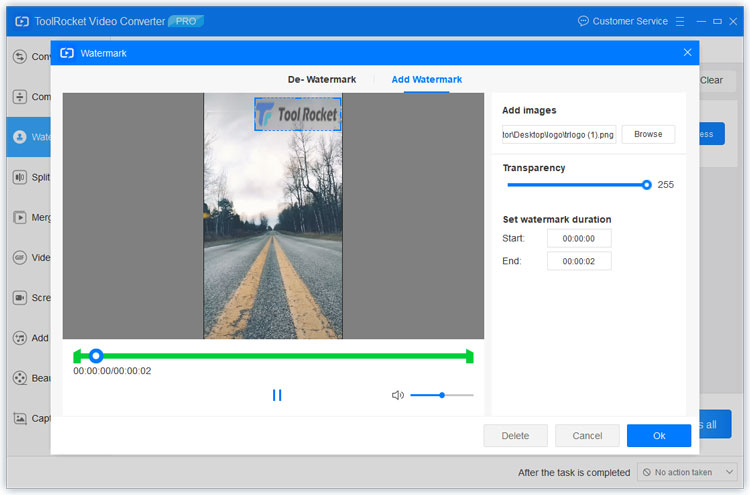
3Process All
After editing the watermark, click at the right bottom corner on the “Process All” button to export it.
ⅣSplit video
Go back to the main interface of ToolRocket Video Converter, and select “Split”.
1Add Files
Click “Add Files” or “Add Folder” button to import your video/audio files into the program. Besides, you can click the “Add” symbol in the middle of the interface or drag the file(s) directly to the interface. Then, they will be displayed in a file list.
2Split video
Click the “Edit division” button in the file list. In the pop-up window, drag the video frame freely to adjust the video aspect ratio.
Drag the pointer at the beginning and end, and click “Add” to set the video length. Confirm “OK” to apply it.
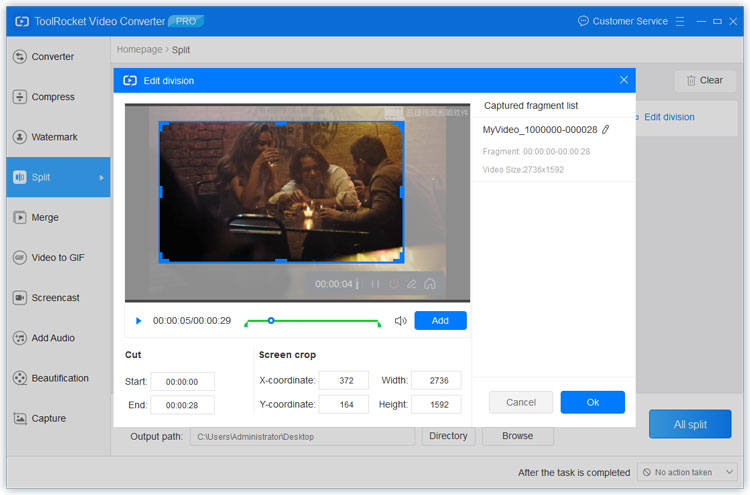
3Split All
Finally, click at the right bottom corner on the “All split” button to save and export it.
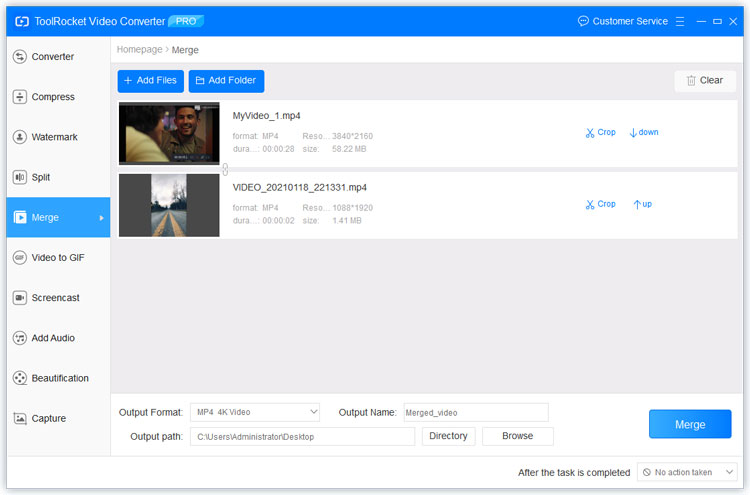
ⅤMerge video
Go back to the main interface of ToolRocket Video Converter, and select “Merge”.
1Add Files
Click “Add Files” or “Add Folder” button to import at lease two files into the program. Besides, you can click the “Add” symbol in the middle of the interface or drag the file(s) directly to the interface. Then, they will be displayed in a file list.
2Cut video
Click the “Cut” button, and you can also cut the video to your desired length. And you are able to change the order of the video files.
3Merge video
Finally, click at the right bottom corner on “Merge” to combine the video clips to a new one.
ⅥVideo to GIF
Go back to the main interface of ToolRocket Video Converter, and select “Video to GIF”.
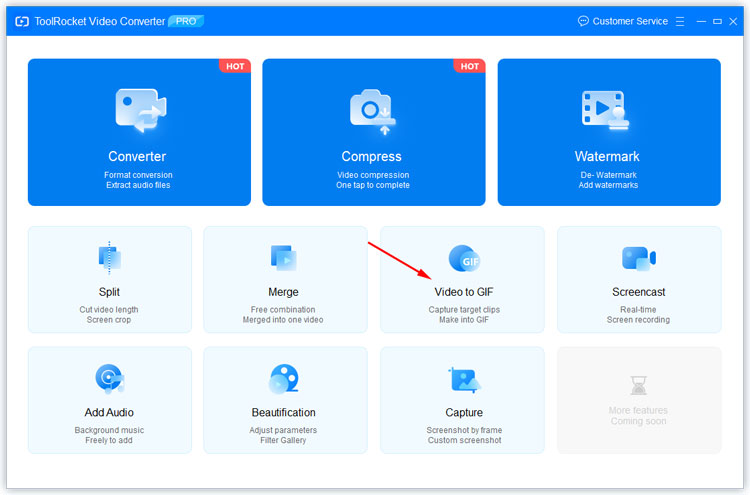
1Add Files
Click “Add Files” or “Add Folder” button to import your video/audio files into the program. Besides, you can click the “Add” symbol in the middle of the interface or drag the file(s) directly to the interface. Then, they will be displayed in a file list.
2Create a new clip
Click the “Clips” button in the file list, and you can cut the video to create a new clip.
3Convert video to GIF
Set the output directory and click “Convert All” to export the GIF in your computer.
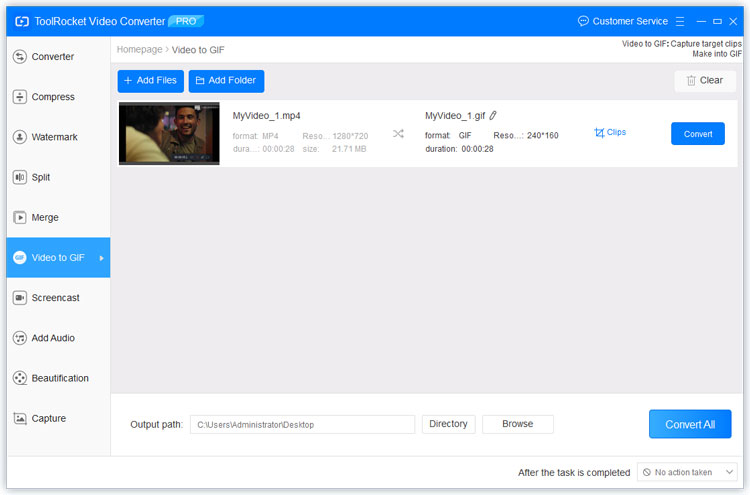
ⅦScreencast
Go back to the main interface of ToolRocket Video Converter, and select “Screencast”.
1Screen recording options
Video options: In this window, you can set the full screen or a selected area to record. If you choose full screencast, you can simply click “Start”. If you only record an selected area, choose “Recording area” and click “Start” to define the area.
Audio options: There are four options are available for you. You can record system sound and microphone voice together or separately.
Quality settings: Choose SD, HD, or original image as the output video quality.
Recording format: You can select MP4, FLV, AVI as the output video format.
2Screencast settings
Click the “Setting” symbol. Here you are able to activate the mouse pointer, and hide/unhide the taskbar after starting recording.
Hotkey is settable. Set the shortcuts to simplify the video capture process including Start/Pause, Stop, Sketchpad starts/stop.
3Record screen
Click the “Start” button to begin recording the screen. For regional screen recording, you need to select the screen area at first and then start recording the screen. During recording, the start button will switch to “Pause”. Click it to pause screen recording.
4Stop screen recording
Click the “Stop” button, the process will be ended and the screen capture will automatically saved on your computer.
ⅧAdd audio
Go back to the main interface of ToolRocket Video Converter, and select “Add audio”.
1Add Files
Click “Add Files” or “Add Folder” button to import your video/audio files into the program. Besides, you can click the “Add” symbol in the middle of the interface or drag the file(s) directly to the interface. Then, they will be displayed in a file list.

2Audio settings
After adding the video to the software, click the “Setting” symbol in the file list. In the pop-up window, click “Add” and upload a local audio file. Then set the start time, audio/video volume. Next, choose “Mixing” or “Clear the original sound” to edit the background audio. Confirm “OK”.
3Export the video
Finally, select the file location through output directory, and click the button at the right bottom corner to start to dub the video.
ⅨOptimize video
Go back to the main interface of ToolRocket Video Converter, and select “Beautification”.
1Add Files
Click “Add Files” or “Add Folder” button to import your video/audio files into the program. Besides, you can click the “Add” symbol in the middle of the interface or drag the file(s) directly to the interface. Then, they will be displayed in a file list.
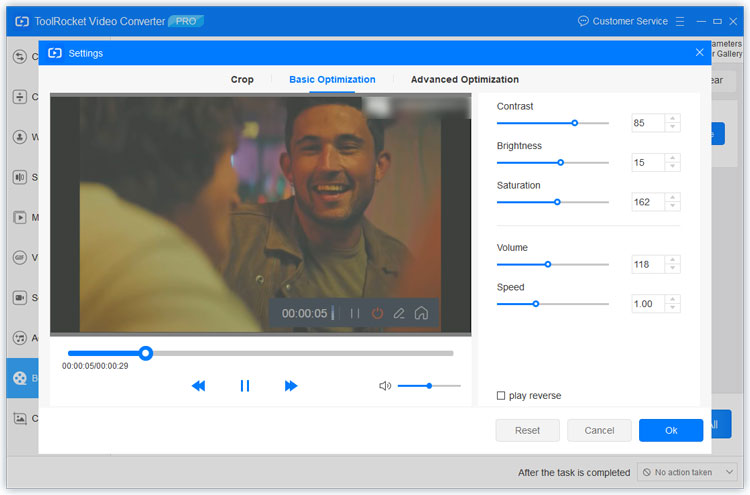
2Video settings
Click the “Settings” button next to the video to adjust the video effect including contrast, brightness, saturation, volume, and playback speed.
Crop: Navigate to “Crop”, you can change the video aspect ratio, video length, rotate or flip the video. Click “Ok” to save the settings.
Advanced optimization: Adjust the RGB image parameter, add a filter such as Dawn, Sunshine, Tokyo, Old, Classic, Grey, Memory, LOMO to the video. Click “Ok” to save the settings.
3Optimize the video
Click the blue “Optimize” button to export the video to your computer.
ⅩMake a snapshot
Go back to the main interface of ToolRocket Video Converter, and select “Capture”.
1Add Files
Click “Add Files” or “Add Folder” button to import your video/audio files into the program. Besides, you can click the “Add” symbol in the middle of the interface or drag the file(s) directly to the interface. Then, they will be displayed in a file list.
2Settings
Click the “Settings” button next to the video to conduct screenshot parameter operations on the video.
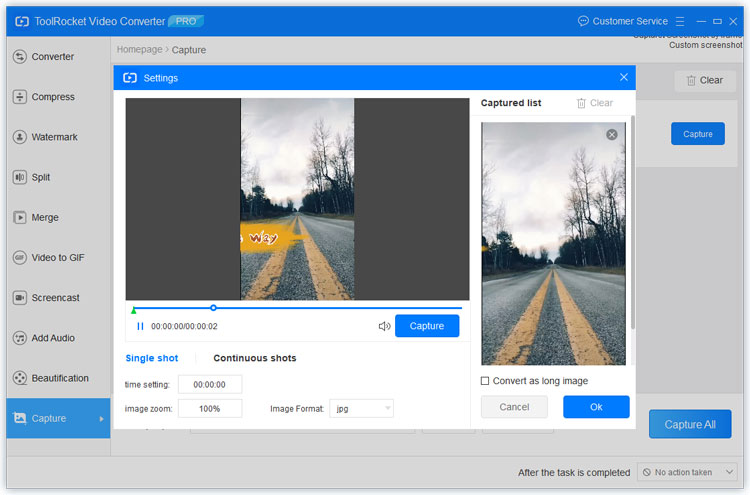
3Make snapshots
Drag the pointer and click “Capture” to create a snapshot. In the meanwhile, you can set the image format, and zoom percentage. If you make several snapshots, you can activate “Convert as long image”. If not, ignore it and confirm “OK”.
4Export the snapshots
Finally, select the file location through “Output directory”, and click “Capture All” button to start exporting them to the destination.